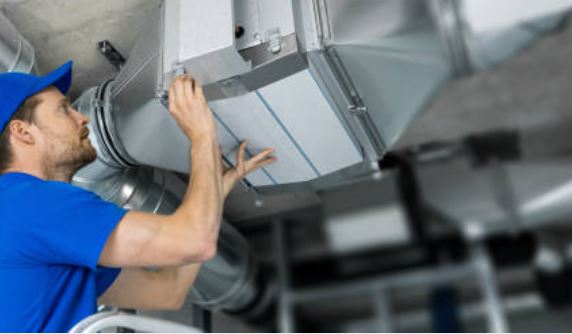
Are you looking for a simplified guide on how to install a ductless mini split? If yes, we are glad you are here.
A lot of time, ductless mini split installation is an affair left for the HVAC professionals. However, you, too, with no knowledge of ductless mini split installation, can do it perfectly. And we are here to assist you to do it.
call 661-888-0248
Contact us 24/7 for HVAC services!
Whether you are looking to save some money or love DIY projects, this guide will come in handy.
We go straight into details of DIY ductless mini split air conditioning installation.
Install a Ductless Mini Split: Materials and Tools Required

The first thing you need to do is collect all the tools and materials needed. This will help you:
- save time during process,
- prevent finding out that you are lacking something crucial when you need it.
Here are the tools and materials you need for ductless air conditioners installation:
- a ductless mini split system (of course)
- plastic condenser pad,
- condenser wall-brackets,
- plastic line cover set
- a drill or screwdriver,
- hole saw,
- adjustable wrench,
- level,
- ladder,
- safety glasses and gloves,
- electrical tape.
What to Know Before Installing a Ductless Mini Split System

First, you need to find a mini split system that is right for you and is DIY friendly. One way to check for this is if it comes with a user’s manual. You can also check reviews of other people who have done the installation themselves.
Some mini splits may be complex to install. You may have to contact your local HVAC professional to do the work for you.
Another thing you need to understand is that a mini split has two units, the indoor unit and the outdoor unit. These units are connected by a copper line that allows for refrigerant flow. Therefore, the installation process will involve:
- installation of the indoor air handler,
- installation of the outside condenser unit,
- connection of the two units,
- and of course electrical connection.
We are now set to get going.
Step by step guide on How to Install a Ductless Mini Split System

Follow this guide to install your ductless mini split.
Step 1: Choose the best location
One good thing about a ductless mini split is that you can install it anywhere. However, you want to choose a location that will result in optimum cooling and heating.
Here are some tips for the best place to locate your indoor ductless mini split:
- choose a centralized place in the room, a place that will favor even distribution of air throughout the room,
- go for a shady area, avoid places affected by direct sunlight, such as near windows,
- avoid generally hot walls such as the bathroom wall,
- away from sources of dust,
- at least 6 feet above the ground.
For the outdoor unit, the best location would be:
- away from direct sunlight,
- away from vegetation as it obstructs the airflow,
- not where snow or ice can fall on it,
- not where other interior devices vent.
After you have spotted the best locations, trace them out for installation.
Step 2: Install the Mounting bracket
The following step would be to install the mounting bracket in your ideal location for the indoor unit.
Ensure that this area is free from pipes and ductwork. This will prevent you from drilling steady holes.
Mark the locations of the stud and fasten them with screws.
Step 3: Drill the Pilot Hole
Before drilling the pilot hole, ensure no obstruction complicates the drilling process. Ensure this from both the outside and inside. If there are obstructions, we recommend that you choose a new location.
Now begin to drill the pilot hole from the inside to the outside.
Remember to drill the holes to slope slightly down. This slope will help the condensate drain the evaporator to the outside unit.
Step 4: Drill the full-size hole
Now take the hole saw and drill a full-size hole. Start from the inside and drill all through. Then, go and finish from the exterior wall. This is to ensure that the hole is even all through.
If you meet any insulation in your drilling process, you will be better off choosing a new location.
Step 5: Run the Line Set
Keenly uncoil the line set from the back of the evaporator coil.
Then, have someone outside and let them help you feed the line set through the pilot hole you have drilled.
As you push the line through the hole, the person outside should gently bend the hole downward towards the location of the condenser.
Also, ensure the plastic collar surrounding the line is rigid during this Step.
Then next is the drain line, the shorter one. It goes in last, below the other set of lines. Install the drain line extension and then wrap the joint with electrical tape to secure it firmly.
Step 6: Install the Evaporator or the Inside Unit
It is now time to hang the evaporator or the inside unit on the mounting bracket. Use a secure ladder and have someone support it while you are on it.
Before that, you need to wrap the foam sleeve around the line section set within the hole.
You can now lift the evaporator coil and launch it on the mounting bracket. Ensure the drain pipe and the communication wires pass through the sleeves. When the condenser unit is well launched on the mounting bracket, you should hear click sounds.
Then, bend the drain wire 90 degrees down towards the evaporator unit located outside. Next, insert a two-piece plastic trim into the hole to prevent uneven and rough edges from damaging the line set.
Step 7: Install the Condenser or the Outside Unit
First, clear out the area of any foliage and vegetation. This will save you so many headaches in the future.
You can install the condenser on the condenser pad on the ground or mount it on a wall bracket. You can also create a concrete pad if your unit will be resting on the ground. Mounting it on the wall makes its connection to the refrigerant lines easier. However, having it on the wall causes some wall vibrations.
Route the line set to ensure it stays firm and tight on the exterior wall. This also ensures no obstructions. Having obstructions makes it challenging to install the cover.
Tip: locating the condenser on the north or east side often gives premium cooling results.
Step 8: Connect the refrigerant lines and open the valves
This stage of ductless installation may vary from manufacturer to manufacturer. You, therefore, may want to confirm if there is some information in the users’ manual.
However, generally, you will need to connect the refrigerant lines coming out of the wall into the condenser unit. The lines come in different colors, which allow you to match them to the colors of the ports on the condenser unit.
Also, they are often different sizes and will match only with the correct port. So, you cannot mess it up if you look carefully.
Then the valves of the outdoor unit come covered. Get off the cover and open the valves, often counter-clockwise.
Step 9: Secure the refrigerant connection indoors
Behind the air handler, you will find the refrigerant connectors. Cover them with vinyl tape and wrap them in a noise-reducing pad.
This will help keep them in excellent condition and reduce the operation noise.
Step 10: Wire the Ductless Mini Split Air conditioner
If you have no experience with connecting electrical wires, we recommend that you call an electrician for this Step of installing mini split systems.
However, the wire numbers and colors are usually labeled if you do it yourself.
Step 11: Cover the Line Set
The last step would be to cover and insulate the hole on the exterior wall. You can cover the line set with the plastic or metal channel cut to length.
Pull the back half of the channel at the back of the line set. Then plumb and stick it well on the wall using self-tapping screws. One line set will travel horizontally to the compressor.
Your ductless air conditioner is now ready for use. You can switch it on with the remote control and make the settings.
Professional Ductless Mini Split Installation

As you have seen, installing the ductless mini split is not a complicated process. However, for some reason or another, many people still get stuck. You could also have less knowledge of electrical connections or the functioning of the refrigerant lines.
Whether you are stuck, have no time to perform this entire process, or doubt your DIY prowess, HVAC Santa Clarita is here for you. It may cost you more money, but you will ensure both your indoor and outdoor units are well set and are functioning correctly.
Feel free to reach us today for a mini split air conditioner installation.
How to Install a ductless mini split Frequently Asked Questions

Installing mini splits is not as complicated as installing a central air conditioning or a traditional HVAC system(1). We answer some questions on the installation of a ductless air conditioner. We hope to shed more light and help make the installation process more manageable.
Can I install a ductless mini split myself?
Yes, you can install your ductless system successfully without involving an HVAC professional. Each ductless HVAC system is unique to the manufacturer. However, the general installation process is the same and straightforward to follow.
How difficult is it to install a mini split?

Generally, it is much simpler to install a ductless unit than a central AC. Many people have done it by following the DIY procedure above, and you can do it too. However, it is not unpopular to get stuck, especially with the refrigerant lines and copper lines. We recommend installing the outdoor condensing and indoor units if you are unsure. You can then call an HVAC installation technician to install the connecting lines.
Does a mini split need to be on an outside wall?
The indoor units do not require venting through an exterior wall. This makes ductless mini splits a practical choice for rooms with no exterior walls or windows.
How long does it take to install a ductless mini split air conditioner?
Typically, it is usually an affair of a few hours for professionals.
However, if you have never done this DIY, it can take two days to complete the project. This also depends on the brand of ductless mini splits. Some brands are much easier to install than others.
How much does it cost to professionally install a mini split?

The installation costs of ductless mini splits often range from $500-$2000(2).
This depends enormously on several factors such as the brand, workload work, location of the ductwork and the duration.
Final Thoughts
It is our time to now call it a wrap. We are glad that you know you can get down to work and install your mini split. It is not entirely about saving on the installation costs. Sometimes, looking at a thing and being able to say you did that feels so good. And you will get this fulfillment with installing your ductless mini split because it is often considered a job entirely reserved for the pros.
However, we are always here to help you if you get stuck. If you cannot figure out one thing or another, we are just a phone call away from you. Message us or call us anytime, and we will assist you in getting the ductless air conditioner installation job done.
call 661-888-0248
Contact us 24/7 for HVAC services!
Sources
https://www.homedepot.com/b/Heating-Venting-Cooling-Mini-Split-Air-Conditioners/N-5yc1vZc4m1
How to Install a Ductless Air Conditioner